Backrest
Warning
I am no longer using restic/backrest. Switched to borgmatic, you can find the setup/config for that here.
Backrest is a web-accessible backup solution built on top of restic. Backrest provides a WebUI which wraps the restic CLI and makes it easy to create repos, browse snapshots, and restore files. Additionally, Backrest can run in the background and take an opinionated approach to scheduling snapshots and orchestrating repo health operations.
Installation
Running with Docker Compose
Docker image: ghcr.io/garethgeorge/backrest
Example compose file:
### --- Backrest - Restic --- ###
# https://github.com/garethgeorge/backrest
services:
  backrest:
    image: ghcr.io/garethgeorge/backrest:latest
    container_name: backrest
    hostname: backrest
    volumes:
      # Appdata mounts for backrest
      - ./backrest/data:/data
      - ./backrest/config:/config
      - ./backrest/cache:/cache
      - ./backrest/tmp:/tmp
      - ./backrest/rclone:/root/.config/rclone # Mount for rclone config (needed when using rclone remotes)
      - ./backrest/ssh:/root/.ssh:ro # Mount SSH directory (needed when using SSH remotes)
      # Mounts for backup data - these can be anything needed to backup
      - /opt/mkdocs:/mkdocs
      - /opt/docker:/docker
      - /mnt/appdata/backup:/repos     # Mount local repos (optional for remote storage)
    environment:
      - BACKREST_DATA=/data # appdata for running backrest
      - BACKREST_CONFIG=/config/config.json
      - XDG_CACHE_HOME=/cache
      - TMPDIR=/tmp
      - TZ=America/Chicago
    ports:
      - "9898:9898"
    restart: unless-stopped
Environment Variables (Unix)
| Variable | Description | Default |
|---|---|---|
BACKREST_PORT |
Port to bind to | 127.0.0.1:9898 (or 0.0.0.0:9898 for the docker images) |
BACKREST_CONFIG |
Path to config file | $HOME/.config/backrest/config.json (or, if $XDG_CONFIG_HOME is set, $XDG_CONFIG_HOME/backrest/config.json) |
BACKREST_DATA |
Path to the data directory | $HOME/.local/share/backrest (or, if $XDG_DATA_HOME is set, $XDG_DATA_HOME/backrest) |
BACKREST_RESTIC_COMMAND |
Path to restic binary | Defaults to a Backrest managed version of restic at $XDG_DATA_HOME/backrest/restic-x.x.x |
XDG_CACHE_HOME |
Path to the cache directory |
Initial Setup
Note
After installation, access Backrest at http://localhost:9898 (or your configured port). You'll need to complete the initial setup process below.
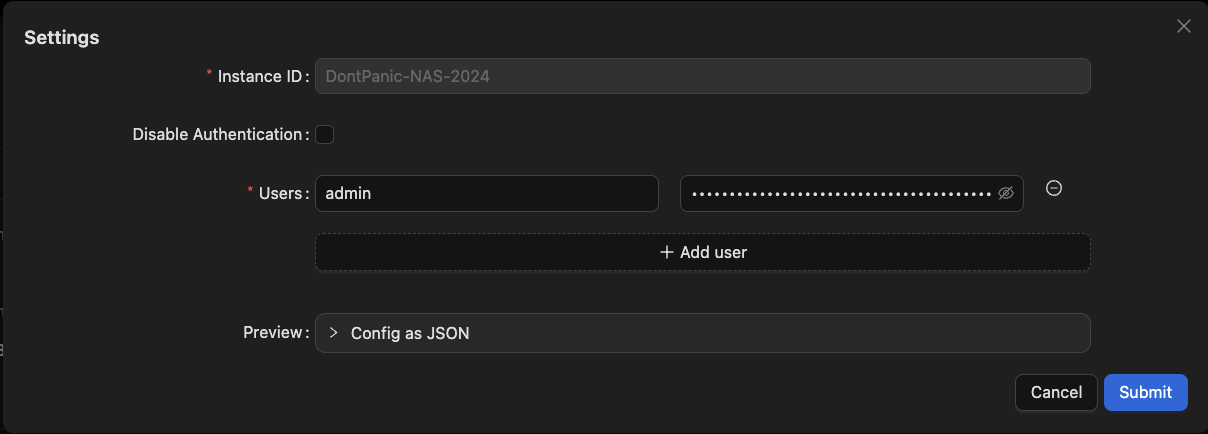
1. Instance Configuration
Instance ID
- A unique identifier for your Backrest installation
- Used to distinguish snapshots from different Backrest instances
- Important: Cannot be changed after initial setup
Authentication
- Set your username and password during first launch
- To reset credentials: delete the
"users"key from:- Linux/macOS:
~/.config/backrest/config.json - Windows:
%appdata%\backrest\config.json
- Linux/macOS:
- Authentication can be disabled for local installations or when using an authenticating reverse proxy
2. Repository Setup
Click "Add Repo" to configure your backup storage location. You can either create a new repository or connect to an existing one.
Essential Repository Settings
- Repository Name
- A human-readable identifier
- Cannot be changed after creation
- Repository URI
- Specifies the backup storage location
- Common formats:
- Backblaze B2:
b2:bucketorb2:bucket/prefix - AWS S3:
s3:bucketors3:bucket/prefix - Google Cloud:
gs:bucket:/orgs:bucket:/prefix - SFTP:
sftp:user@host:/path/to/repo - Local:
/mnt/backupdisk/repo1 - Rclone:
rclone:remote:path(requires rclone installation)
- Backblaze B2:
- Environment Variables Storage provider credentials:
- S3:
AWS_ACCESS_KEY_ID,AWS_SECRET_ACCESS_KEY - B2:
B2_ACCOUNT_ID,B2_ACCOUNT_KEY - Google Cloud:
GOOGLE_PROJECT_ID,GOOGLE_APPLICATION_CREDENTIALS
- S3:
- Optional Flags Common examples:
- SFTP key:
-o sftp.args="-i /path/to/key" - Disable locking:
--no-lock - Bandwidth limits:
--limit-upload 1000,--limit-download 1000
- SFTP key:
- Maintenance Policies
- Prune Policy: Schedule for cleaning unreferenced data
- Check Policy: Schedule for backup integrity verification
After adding a repository, use "Index Snapshots" to import existing backups. Continue to the next section to set up your backup plan.

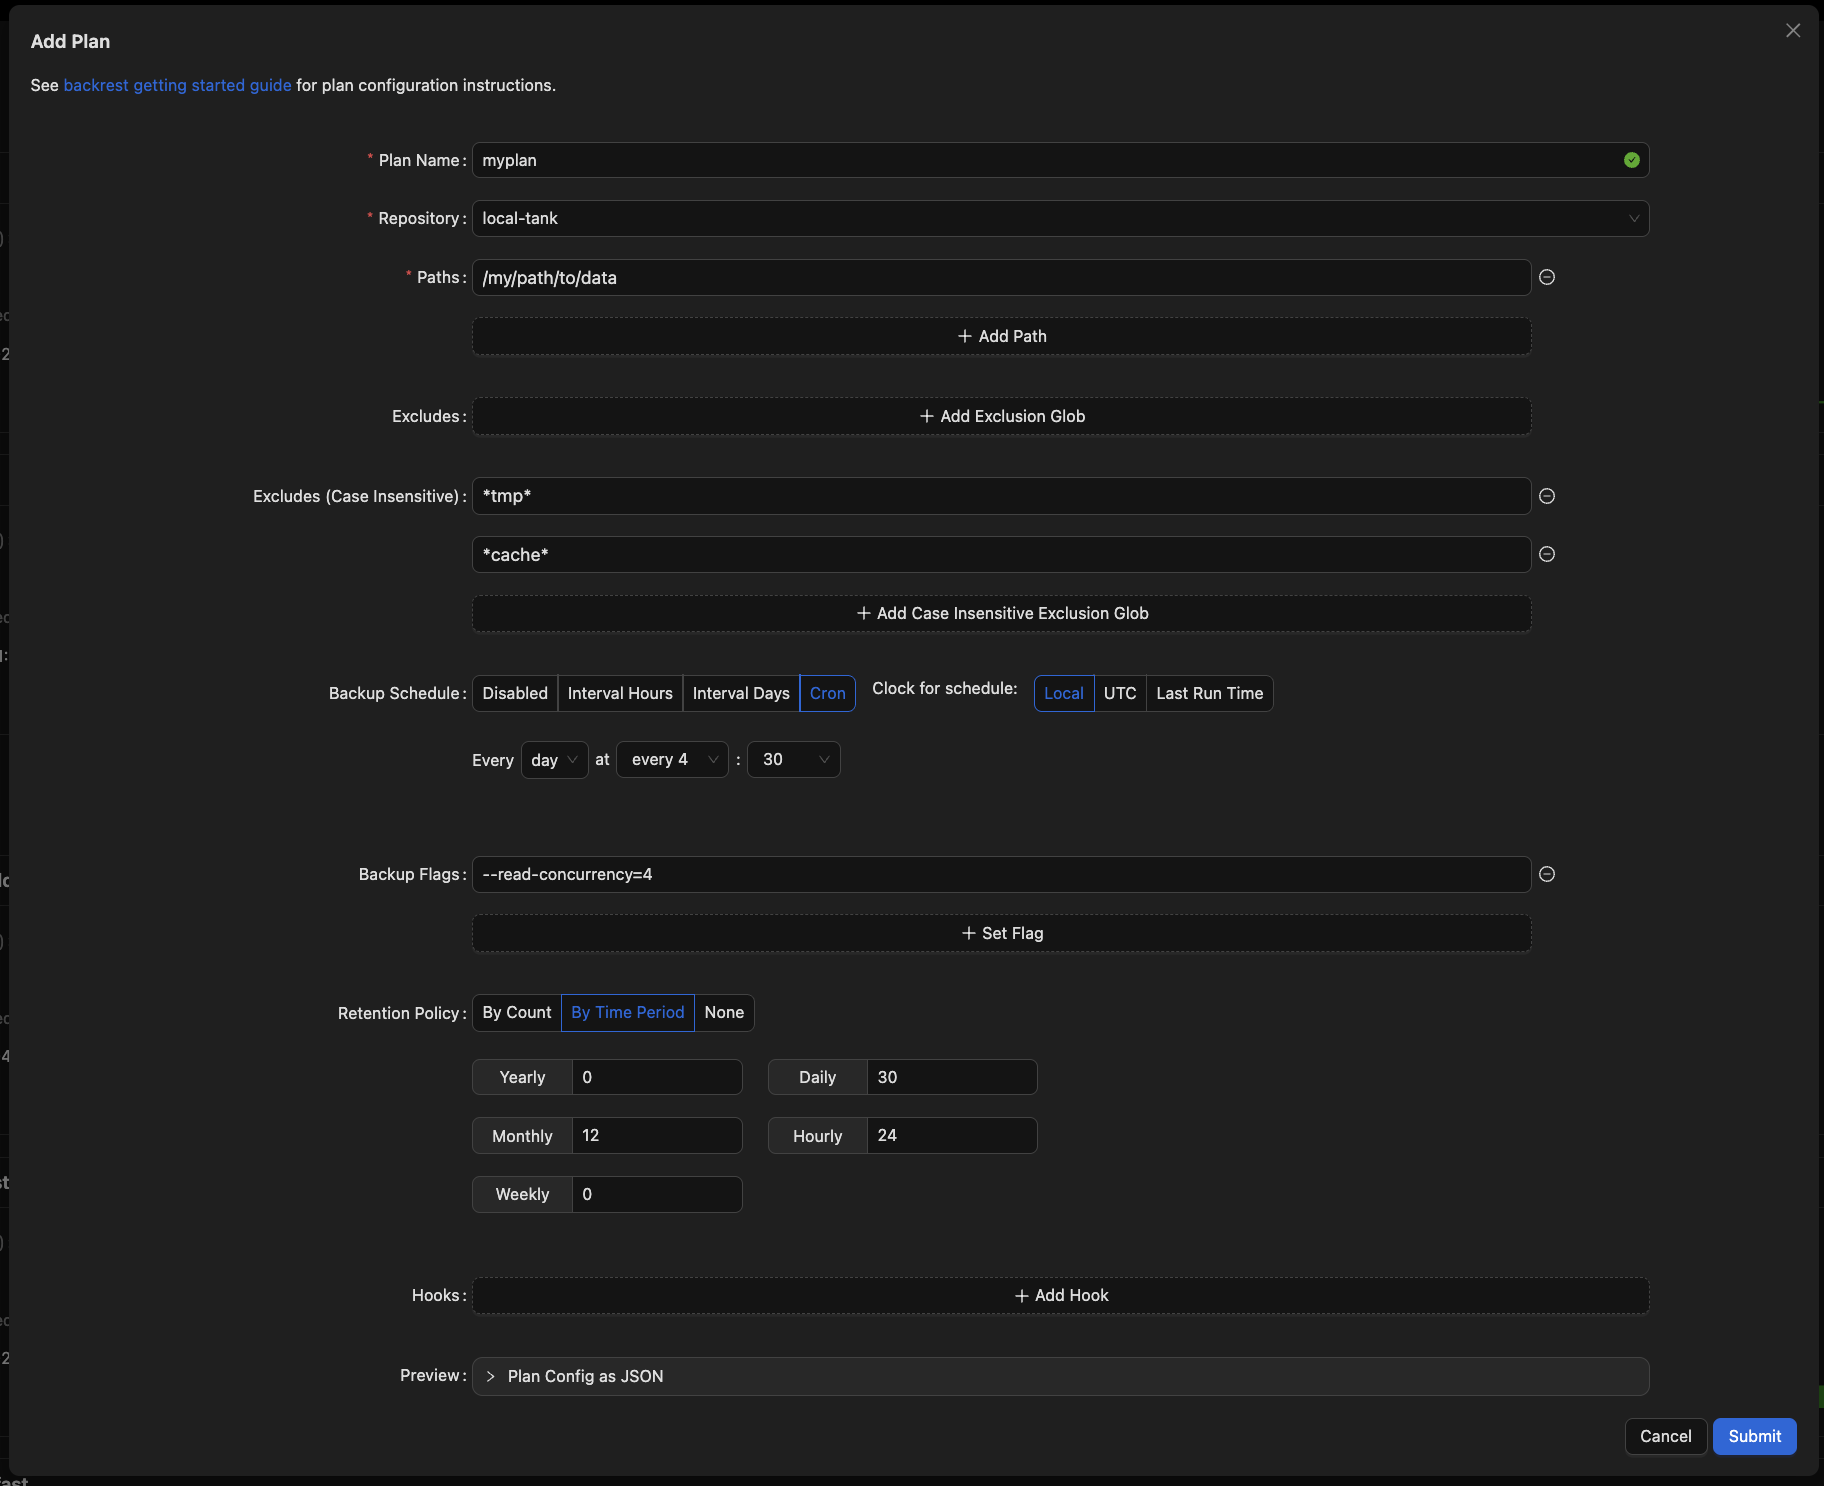
3. Backup Plan Configuration
Create a backup plan by clicking "Add Plan" and configuring these settings:
Plan Settings
- Plan Name
- Choose a descriptive, immutable name
- Recommended format:
[storage]-[content](e.g.,b2-documents)
- Repository
- Select your target repository
- Cannot be changed after creation
Note
Ensure to copy SSH keys to/from the remote repos if using SFTP. Location for the container is referenced in the compose file above. You can also call another key location using the flag -o sftp.args="-i /path/to/key"
- Backup Configuration
- Paths: Directories/files to backup
- Excludes: Patterns or paths to skip (e.g.,
*node_modules*)
- Schedule Choose one:
- Hourly/daily intervals
- Cron expression (e.g.,
0 0 * * *for daily midnight backups) - Clock options:
- UTC/Local: Wall-clock time
- Last Run Time: Relative to previous execution
- Retention Policy Controls snapshot lifecycle:
- Count-based: Keep N most recent snapshots
- Time-based: Keep snapshots by age (e.g., daily for 7 days, weekly for 4 weeks)
- None: Manual retention management
Success
Success! Now that Backrest is configured, you can sit back and let it manage your backups. Monitor the status of your backups in the UI and restore files from snapshots as needed.
Tip
Make sure to save a copy of your repository credentials and encryption keys (e.g., password) in a safe place. Losing these will prevent you from restoring your data. Consider storing your entire Backrest configuration (typically ~/.config/backrest/config.json) in a secure location, such as a password manager or encrypted storage.
SSH ISSUE